

The Faerie Glen
This is a step by step tutorial to assist those who find watching you tube hard to follow. I thought it might also explain some of the techniques too.
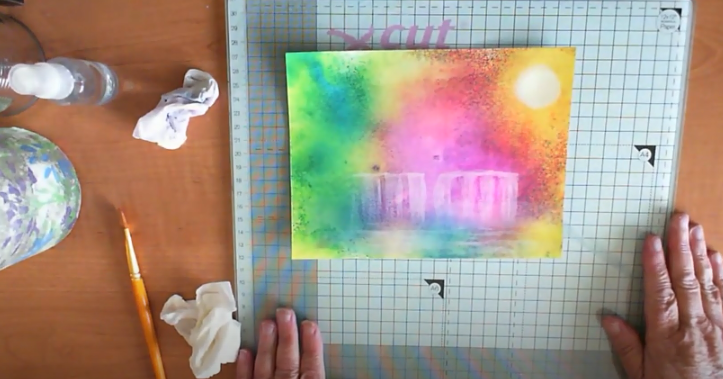
For this project I am using 140lb or 350gsm watercolour paper. Dylusions inks, Calypso Teal, Lemon Zest and Funky Fuchia. Acrylic paint White. Distress oxide Faded Jeans. Versafine clair inks for stamping.

To begin with spray the 3 inks onto the watercolour paper, then spritz with some water

Using some old plain paper place over the inks and smooth out to remove some of the ink and to slightly spread the ink.

The ink has now spread and mixed in a more delicate texture.

Taking some white acrylic paint spritz with water to thin slightly.

Mix the white as shown and apply over the inked background. Make sure your paper is dry before doing this, as I found the slightest dampness starts the ink to mix with the white and drags other colours where you do not want them to be. The reason I am using the white is to lighten the inks, dylusions are very vibrant and the white gives the background a misty look.

I am now using the white still to place the water and where I want the waterfall to be.

Another photo showing the water effect

I am now making the sun using the white acrylic paint.

The completed sun

Now I am starting to add the waterfall, I am using a flat brush getting the paint to a thin point on the end of the brush. Then draw a short line and drag your brush down. The paint should lightly touch the paper so you get a dry brush effect.

Working along the water and placing more falls. The more colour you have in your background the better your falls will become, here it is more pink and darker blue in the water creating an illusion of hidden rocks.

I decided to make this with 2 waterfalls so continue along adding gaps if possible to break them and you can add rocks or mist.

Now I am adding white to add the effect of water. Just lightly touch the paper with the brush.
Now I have the light hitting the water creating various colours giving it a more magical effect. I am not too worried about the marks on the paper I can hide these.

I am now going to use the stencil to give the effect of distant foilage in the background. I used Faded jeans distress oxide for this but any distress ink will work. Stencil is available from Lavinia stamps I will add links below.

This is how the scene is looking with some stencils


I have used the stones stencil also available from lavinia stamps.
This stencils I am using as a guide, I will paint these and add highlights.

I am adding the faeries now and the Faerie hives.

Now the other images are stamped I added shadow to the falls and painted in the stones.

Adding some highlight to the stones and rocks. I have added some more rocks in the water.

And completed. I the video then thought I would try and cover the marks and added leaves. This you can see in the original piece at the top of this post.

The above is another version using the same inks and techniques in an old hard back book
I hope you try this little fun scene... Holly
Stamps & stencils used are available from
Lavinia Stamps https://laviniastamps.com/
For the full videos you can find my channel clicking the link at the side.