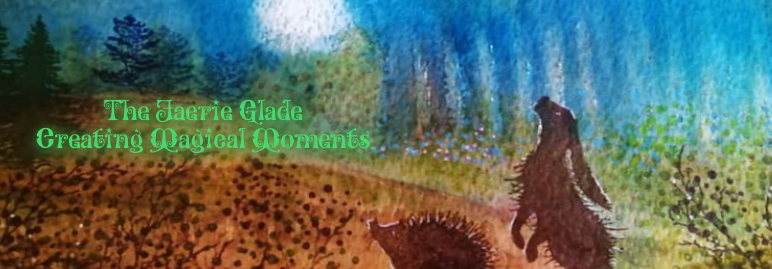
Friday 1 January 2021

A Faerie Merry Christmas


For Robyn

It was almost Christmas in the village of Glendale, snow was falling and getting quite deep. Icicles hung from the tiny houses and the children were out with their boots, scarves, hats and gloves. Excited to see the snow, they started to make large snowballs, these would eventually become snowmen and snow ladies. It was evening the light was dull, glow from the street and houses assisted the children so they could play outside longer. Winter has its beauty and its dark days, this did not stop the children they laughed and called with delight for more snow, some called for others to collect coal or stones for the eyes and buttons, others called for carrots for the nose, while the rest rushed around to collect hats and scarves to keep the snow people warm.


Deep in the forest that surrounded Glendale the Faerie people lived, their tiny houses stood along the tiny stream that led to the joining of the river Elder, that flowed through the village leading the magestic waterfalls.
Rory and Darcy the faerie children raced through the forest, fluttering as they went. The falling snow touched gently on their wings making them gleam and glitter. They could hear the rumble and horses hoofs thud along the snow covered forest floor. It was the Christmas coach racing towards the village, it carried letters parcels and distant families who would be gathering this Christmas.
Rory and Darcy flew on their wings to race alongside the coach, the driver was too keen to get to the village he didn't notice them, Rory and Darcy landed on the back of the horses to enjoy the fun of the ride.


Just before the coach reached the village the two little faeries jumped off of the horses backs and flew back to the forest. Watching the coach head off into the distance.
Darcy had remembered they needed to light the stars on the forest trees to welcome in Father Christmas in a few days time. With that they flew off as fast as they could to light the fir trees, that stood tall in a small clearing of the forest.


One by one they lit the stars with their magic dust on the tops of the trees, the snow was falling heavier now and it started to cover the branches. It was a winter wonderland in the faerie wood. Rory and Darcy were tired so turned from the trees towards their homes, until the next day.


It was still snowing when the sun started to rise the following morning. Deep in the forest the fox family has gathered trying to warm themselves from the little heat that the sun was giving. Both were hungry but didn't want to leave the feeling of warmth so they sat there a little longer. Both looked around each other both were thinking of Father Christmas who would be arriving the next night, it was one more sleep until Christmas eve. Both loved Father Christmas he would always bring them cookies and milk with him, some would be from the houses he has visited for he could not eat them all and wanted to share with his furry friends. Father Christmas thought of everyone even the tiny creatures within the woods, as well as pets.


Darcy awoke early the next morning for it was Christmas eve, she was looking forward to seeing Father Christmas helping him with all the delivering of presents to the village. She stepped out into the snow with her mouse Clara both headed towards Rorys house. A surprise awaited them, for his house was covered in frost and a dusting of snow, she could see tiny foot steps leading from the door. Darcy went up the icy path and tapped on the tiny door. There was no answer she tapped again but still no answer. Oh she thought Rory must have gone to check the stars on the fir trees. With that she turned around and made her way with Clara to the woods.
Darcy followed the tiny foot steps but they led past the fir trees that were still shining bright, the foot steps were heading towards the village.


Darcy and Clara had walked what felt like forever in the deep snow, eventually they came towards a path slightly clearing from the warmth of the Sun. Another fox family were sitting in the warmth of the Sun, all who lived in the forest were trying to keep warm. As she passed them she greeted them with "Good morning!" The foxes made a gruntled sound and nodded to Darcy. 


Darcy and Clara continued once again on their journey, they could see the bridge to the village just ahead. Upon the bridge Darcy could see Rory and Mr Hare looking at the lovely decorated house that stood from the bridge. She dashed to meet up with Rory.
Rory explained to Darcy that everyone in the village had become ill over night, Mr Hare had asked for Rorys help, but he had discovered that he needed much more help. We need to gather all the other fairies and creatures within the woods to help Rory told Darcy, Clara and Mr Hare. 


All four of them made their way back to the woods where they all lived. The word soon got around why the two fairies and Mr Hare wanted everyones help. Father Christmas would be arriving this very night, they couldn't let him get ill, who would be able to deliver presents all around the world. So everyone decided it would be down to the fairies to take the presents and deliver them to all the children in Glendale Village.


To be continued


Saturday 26 September 2020

The Faerie Glen


The Faerie Glen

This is a step by step tutorial to assist those who find watching you tube hard to follow. I thought it might also explain some of the techniques too. 

For this project I am using 140lb or 350gsm watercolour paper. Dylusions inks, Calypso Teal, Lemon Zest and Funky Fuchia. Acrylic paint White. Distress oxide Faded Jeans. Versafine clair inks for stamping.


To begin with spray the 3 inks onto the watercolour paper, then spritz with some water

Using some old plain paper place over the inks and smooth out to remove some of the ink and to slightly spread the ink. 

The ink has now spread and mixed in a more delicate texture.

Taking some white acrylic paint spritz with water to thin slightly.

Mix the white as shown and apply over the inked background. Make sure your paper is dry before doing this, as I found the slightest dampness starts the ink to mix with the white and drags other colours where you do not want them to be. The reason I am using the white is to lighten the inks, dylusions are very vibrant and the white gives the background a misty look.


I am now using the white still to place the water and where I want the waterfall to be.


Another photo showing the water effect


I am now making the sun using the white acrylic paint.

The completed sun 

Now I am starting to add the waterfall, I am using a flat brush getting the paint to a thin point on the end of the brush. Then draw a short line and drag your brush down. The paint should lightly touch the paper so you get a dry brush effect.

Working along the water and placing more falls. The more colour you have in your background the better your falls will become, here it is more pink and darker blue in the water creating an illusion of hidden rocks.

I decided to make this with 2 waterfalls so continue along adding gaps if possible to break them and you can add rocks or mist.

Now I am adding white to add the effect of water. Just lightly touch the paper with the brush.

Now I have the light hitting the water creating various colours giving it a more magical effect. I am not too worried about the marks on the paper I can hide these.

I am now going to use the stencil to give the effect of distant foilage in the background. I used Faded jeans distress oxide for this but any distress ink will work. Stencil is available from Lavinia stamps I will add links below.

This is how the scene is looking with some stencils


I can now begin on the rocks around the waters edge


I have used the stones stencil also available from lavinia stamps.

This stencils I am using as a guide, I will paint these and add highlights.

I am adding the faeries now and the Faerie hives.

Now the other images are stamped I added shadow to the falls and painted in the stones.

Adding some highlight to the stones and rocks. I have added some more rocks in the water.

And completed. I the video then thought I would try and cover the marks and added leaves. This you can see in the original piece at the top of this post.

The above is another version using the same inks and techniques in an old hard back book

I hope you try this little fun scene... Holly

Stamps & stencils used are available from 

Lavinia Stamps https://laviniastamps.com/

For the full videos you can find my channel clicking the link at the side.


Sunday 30 August 2020

Mini Easel Box for Trinkets


Mini Easel box with drawer

I love these little boxes they are great to send as a gift or you can use them as gift boxes. I usually create them using Lavinia stamps so they are mysical scenes on them. The above I created mainly for this blog post so it was slightly rushed to decorate. I ususally place a little charm bottle inside using charms to represent the person or what gift it will be.

To start you need A4 card of your choice I used kraft card for this project as it is stronger. You will need some papers or as i have used some watercolour paper sprayed with inks. Embellishments of your choice.


You need to cut sizes of the card as shown above these are in inches sorry about that.

Easel section:

Cut piece of card Easel stand @ 6 x 3"scored along the six inch side @ 1-1/2 & 3"

Cut piece of card Easel face  @3 x 3 this will be the stand up face card on your easel. 

The size for papers will be @ 2-3/4 x 2-3/4"

Drawer section:

Cut piece of card for Draw wrap @ 8-1/2 x 3" scored along long edge @ 1, 4, 5 & 8"

Cut piece of card for Drawer @  4-7/8 x 4-7/8" scored @ 1" on all four sides

The size for your papers will be 4 pieces @ 2-3/4 x 3/4"


Once you have scored all pieces make the box by cutting down one line of the corners and cut a wedge shape this helps the box align better with the sides. Glue into place the cut tabs to the inside of the box.

The box sleeve fold and glue the 1/2" mark to the inside of the sleeve so it does not show on the outside. This works well if you are just making the box in pattern card.

Fold the easel part as shown in the above photo top right hand corner as you can see it folds and will lay flat. 


The above photo just shows how to make the box up for your reference I use tiny pegs to hold the tabs in place as the glue sets. I find PVA glue the best on kraft card it has a stronger bond.


Attach the easel piece of card to the top of the box sleeve as shown in the above photo. To know you have it the right way round you should be able to lay it flat.

I have shown the 3x3 to the easel so you can see how it should look. Once you have decorated the 3x3 bit of card then attach it to the fold to the bottom of the piece of 3x3 so that the easel and the face lay flat. 


You can see in the above photo that my easel top will lay flat. 


As you can see by the above photo I have now decorated my box using my own design of spray inks on watercolour paper and used a couple of stamps to decorate. I added a little handle to the front this is a brad handle I bought them a few years back now, really wish I had got more. Youu can make handles using beads on wire and pushing the wire through the front and fix behind. 


I prefer my boxes to have feet so they stand up from the surface. I used some bare basics wooden buttons. These I purchased from The Range store, the bag was huge at the time it seemed expensive but I have made endless amounts of these boxes and I still have more left. You can add 2 buttons to raise it higher.


Finally my completed box, as I mentioned this was just a quick make for the tutorial I have added more images to the end of the tutorial showing some different styles.

Hope you try this project out they are easy to make I will add another tutorial for you can add these to a box so keep  watching.


Faerie Style Trinket Box


A varied selection of Trinket Boxes complete with charm bottles


Thanks for viewing keep safe and well

Happy Crafting 

Holly

Saturday 25 July 2020

Autumn Glory


Todays weather got me thinking about Autumn so I decided to re do the Shanty stamp this time part Autumn theme to represent the changing of the seasons.


I had some off cuts of mount board so decided to experiment with how well it would hold watercolour paints or inks. I have added how I built up the scene and what colours I have used.


The above photo shows a range of inks for painting and the colour ink I used to stamp out the Shanty path and eventually the cute animals and twigs.


To start with I used  Stormy sky and let it drop in to the wet damp board as I stated this is not as easy as with watercolour paper for the water absorbes the board faster. then adding a watered down wash of Fired brick then Wild honey and finally Scattered straw.


I added a little more fired brick to the sky then adding some peeled paint to create shadow. The distant shrubs are using wild honey and a watery bundled sage.


Continued to build and use a mix of wild honey and peeled paint for the grass areas.


Now adding the branches of trees and some hares using versafine clair acorn ink what got missed I was able to use my pro marker alcohol ink in chocolate worked fine. I added some drops of spiced marmalade to give the effect of falled leaves and the moss and ivy on the shanty turning Autumn looking.


Darkening down the area where the hares are and around the path painting the shanty to look a bit weathered like faded wood panels continue to bring in more shadows and shaded areas.


For the final part of the scene I added some leaves using 2 different coloured clair inks and using spiced marmalade distress ink using the dots stamp. Adding some ivy berries and mushrooms to the foreground. Scattered around are tiny flowers and berries in the roof of the shanty. Finally to distress around the top using faded jeans and around the bottom half using peeled paint.


I really enjoy creating these little scenes they are fun to create and very relaxing, unless you have a happy mistake. What every you are creating enjoy and experiment. Keep well.

Holly